Saturday, 26 March 2011

Building a Different Retaining Wall: Part 2

One more deadman beam and I'm through with the beams. The forces will be held at bay.

Here Dan is begining the vetrical posts of the fence, since he pre-cut his pieces he can fly on the 
installation.

As you can see he is on a roll, as I am dealing with a rather large rock and I'm intent on getting it out of the way.

Our nailing pattern is toe-nailed to drive the post down and over and finishing with another beam.

We decided to put two more nails as shown to stregthen its final resting place.

Click on the photo to see a larger image.
Our retaining wall is finished aside from some gravel needing to be pushed around it looks good, just another day for Team Stanfield.

Tuesday, 15 March 2011

Building a Different Retaining Wall: Part 1

Today is the start of a different retaining wall on the same job site. We will use a similar method of building only with this one we don't have any bedrock to fasten it to.

Tom Roocroft in one of his smaller Volvos clears the are for a 2 car parking spot.


Once cleared Tom digs a 8" deep trench on the line we marked out for him using a string line and two survey markers for the property line.


A cool shot of Tom taking down a standing dead tree with his machine. And look, Mikey likes it!


A load of crushed rock is delivered for the parking spot and we line the bottom our trench with about 5"- 6" of it, pack it down and level it out. 


Once the crush is packed down we set up the string line again and lined up the first 6"X6" We chose a straight 16' to be the first beam in our wall.


We are looking to make the wall 30' long. There is a root and some bedrock in the way so will have step the beams over as we build it up.


To die into the bedrock we need to make taper the beam at the end. For this I used the 10" circular saw.


As we get up to the 3rd row we are gonna install some dead man beams back into the dirt to stop the pressures of the crushed rock from pushing out the wall. Here Mike and Richard are digging a spot of the T Beam.


Placing the beams is tedious because it must be level with row of beams and be level on its own. We don't want the beam sticking up out of the crush because the wall is only 4 rows high.


Here is a shot of the T Beam in place. Again we have to use this method of dead man ties because there is no no bedrock to anchor to. 


Thursday, 10 March 2011

Building a Retaining Wall: Day 9

Starting the day with measuring our rebar and making sure we can get them down all the holes.

Here is a shot of out epoxy coated rebar that we are using.

Mike is putting a few more of the 10" spikes into the corner to make sure it's solid.

Here is another shot of the corner, there is still a few lose ends sticking out that will need to be trimmed. 

Here is a shot of the return, hopefully it ties in well with the walkway.

The corner has been trimmed and its looking pretty mint if you ask me.

Here it is up to the right height now and its time for grouting in the dowels into the dead man beams.

Mike is cutting the rebar down to the proper length with a 5" angle grinder with a zip disc on it.

Unfortunately the holes are filled with up with water. We have attached a metal rod onto the end of an air hose and we plan to blow the water out.

I'm pouring the grout into the hole, I fill the hole all the way up before putting the rebar in.


Here is a video of our air hose contraption at work, its amazing. 

Tuesday, 8 March 2011

Random stuff nothing to do with a retaining wall.


So today turned out to be a lot of little projects, starting with siding. The rain screen and the vent strips are in place, so lets begin.  It will be hardy panel siding, the material is already painted, lets rock n roll.


A few joist were in our way, we pulled those out and were on our way.

 
We've decided to go with this tool. We call it the "the nibbeler, nibbels," at least thats what it looks like.  It does a good job and quick, the other tool is a 7 1/4  saw with a dust shroud fixed to the base and blade housing, and then hooks up to a shop vac,as wll as a carbide tipped  saw blade designed to with stand the hadrdy panel. Too much work to cut a few pieces so away we went.

Befor you make your cut take into account what side of your line you are cutting , "Nibbels" eats a 1/4 inch with each cut.

After we set the nail depth to a proper setting, we installed the first piece .

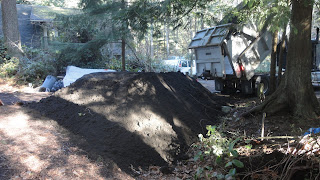
Look the dirt for the planter box arrived, more to come on that project.


A final look at this and on to the side were we removed the joist to finish the siding.

The tool consists of a shear and to stops, the shear is below the panel and the stops are above. The shear works like a giant pair of scissors but only one shear.

WE used a jig saw to make these cuts and it was hard on blade and it made a lot of dust. If you do have to do this, you should be wearing at least dust mask.


We also got to install the facia, you can see its a long way down so we take every precaution.

I enjoy the feeling of safety that comes from wearing a harness.

So Dan and I finished the facia , we couldnt get a good shot of it .


Saturday, 5 March 2011

Building a Retaining Wall: Day 8

Once the kickers are down we can tack the plywood forms in place making sure its level and plumb. Once tacked in place we can scribe the shape of the rock onto the plywood.

This is the line that was scribed onto the plywood, to fit securely on the rock the line must be followed carefully. To cut this out we will use a jigsaw to stay accurate. 

Here is the piece once it has been cut out, it may take a few adjustments and re scribes to get the fit you want. In this case the bottom of the concrete is not exposed so the fit is just to hold the concrete from pouring out the bottom. 

Once there is a good fit on the bottom of the plywood I was able mark out the heights and lay out the stairs that will be leading down to the pad in front of the mechanical room door. 

Here is the sheet of plywood laid out with the 2 steps. There is an 8" rise and a 3' run for the steps to properly fit over the bedrock.

The rest of the pieces are tacked and marked in a similar fashion. using the plumb side of the last sheet makes it easy to get the next one level.

Adding the 2x4 at the top of the forms allow us to keep them straight and to attach braces to the forms easily to keep them plum while pouring the concrete. 

After all the pieces are in on the right side of the walkway we can start to install the stair risers they to will have to be scribed as well. There is no need for any forms on the left hand side as the bedrock rises quickly and having the concrete die off into the bedrock will look cool. 

Thursday, 3 March 2011

Building a Retaining Wall: Day 7

This morning we had more rock to move and we made short work of it. We are clearing the way for a concrete walkway to the mechanical room.

Here you can see Dan meticulously cleaning the rock. We are preparing the rock for formwork and later concrete. Clean rock will bond well with the concrete.
We started with a batter board and plotted the course. We decided that a 4' wide walkway would be sufficent for the owners needs and tied in nicely with the existing pad at the mechanical room door.

Here are a few of the fasteners we are using to attach the 2x4 bottom plates to the bedrock. They are called coil anchors and have a higher "holding" strength than that of wire nails. The anchor and washer are reusable but the coils on the end will stay in the hole for good. The coils are bought in bulk along side the anchors. 

With our first board attached, we seem to be on the right track.  First things first, you start off by drilling a 3/8" hole with a hammerdrill, while keeping ample force on the 2x4 so that once the bit makes contact with the bedrock it doesnt jump around. Then you take the coil anchor and hammer it in to the rock stopping 1/4" before it's tight. This way you can use a wrench to tighten it up and engage the coil on the tip of the anchor. 

With all that being said you can now transfer your string-line down to the bedrock in a few spots per 2x4 so as to keep the line nice and straight.  Seeing as how your material doesnt come that way, you make do with what you can. We suggest accounting for your plywood forms while setting your string-line. We most commonly use 3/4" plywood so setting your 2x4 bottom plate (kickers) at 4' - 0 3/4" will give you 4' of concrete once the forms are stripped away.

 Step one is finished and here are the kickers. Next is the plywood formwork for the walkway with two stairs.  But for now we must go move all our material to a more suitable place, as the landscapers need the land to do some scaping. So off to some heavey lifting!!  And stay tuned  :)