Monday 28 February 2011

Building a Retaining Wall: Day 5

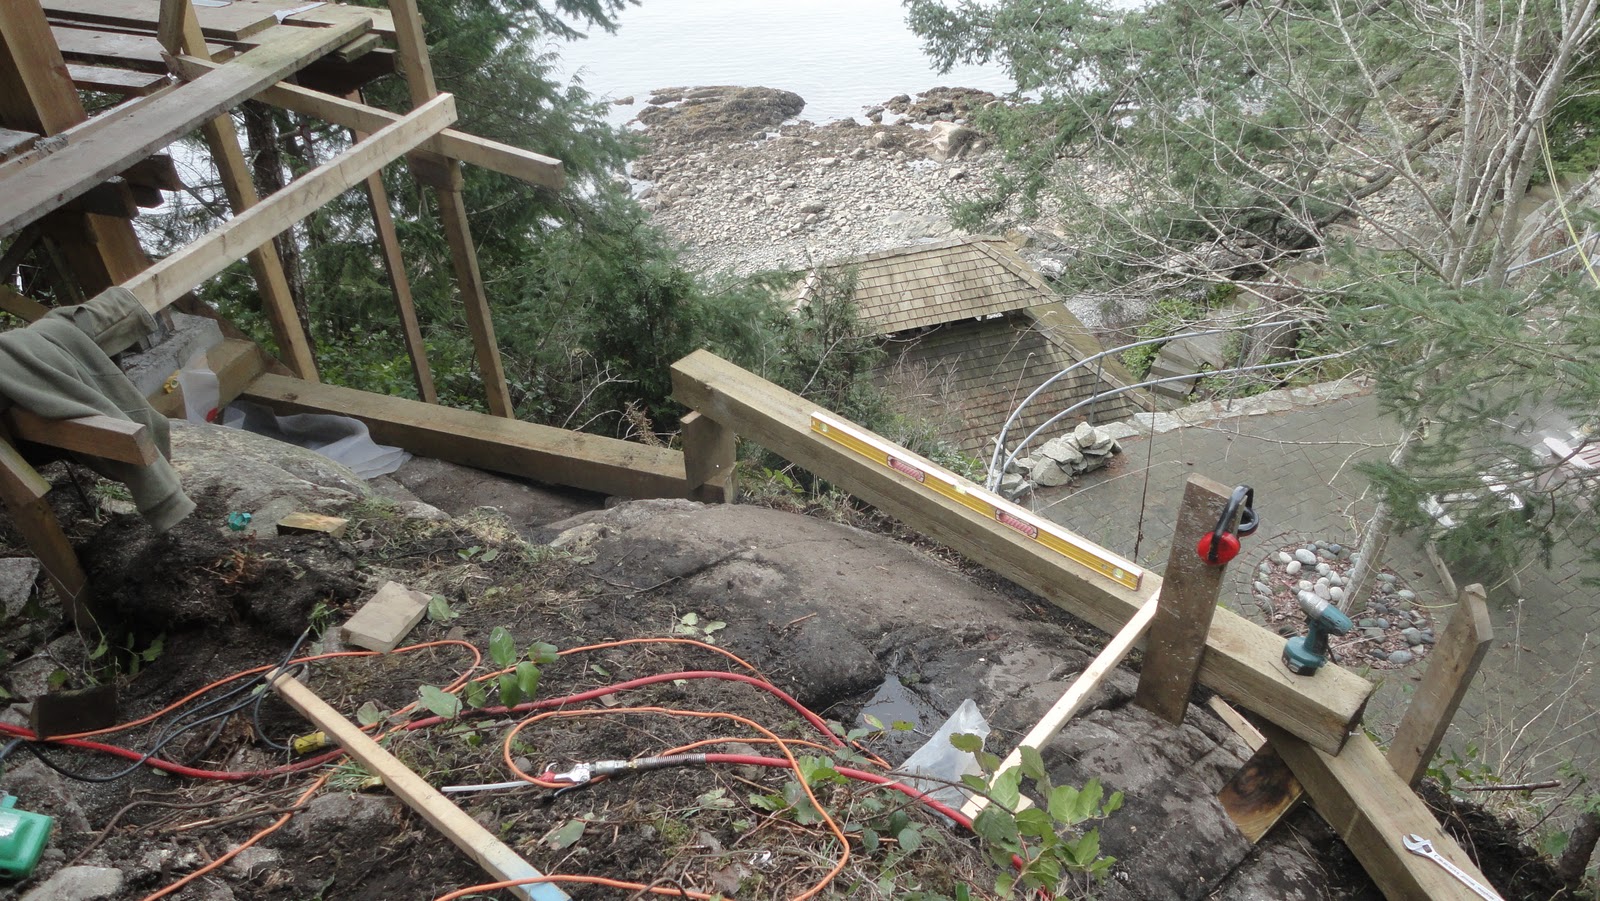
Today was the final preparations for the blasting crew to come and drill the dowel holes for the retaining wall. We made sure that all the holes we drilled could all reach the bedrock with out much trouble. This also included a few more dead man beams and some excavation. 

Mike making sure that there is a good landing spot for the dead man beam. Making sure the beam can be as long as possible makes it a lot stronger and makes the it much harder to pull out.

As the wall gets higher the scaffold used to install the siding is starting to get in the way. One of the next tasks will be taking this down. Woot :(

Easier than notching out the beam we ripped a piece of backing and drilled through both to dowel it to the bedrock. 

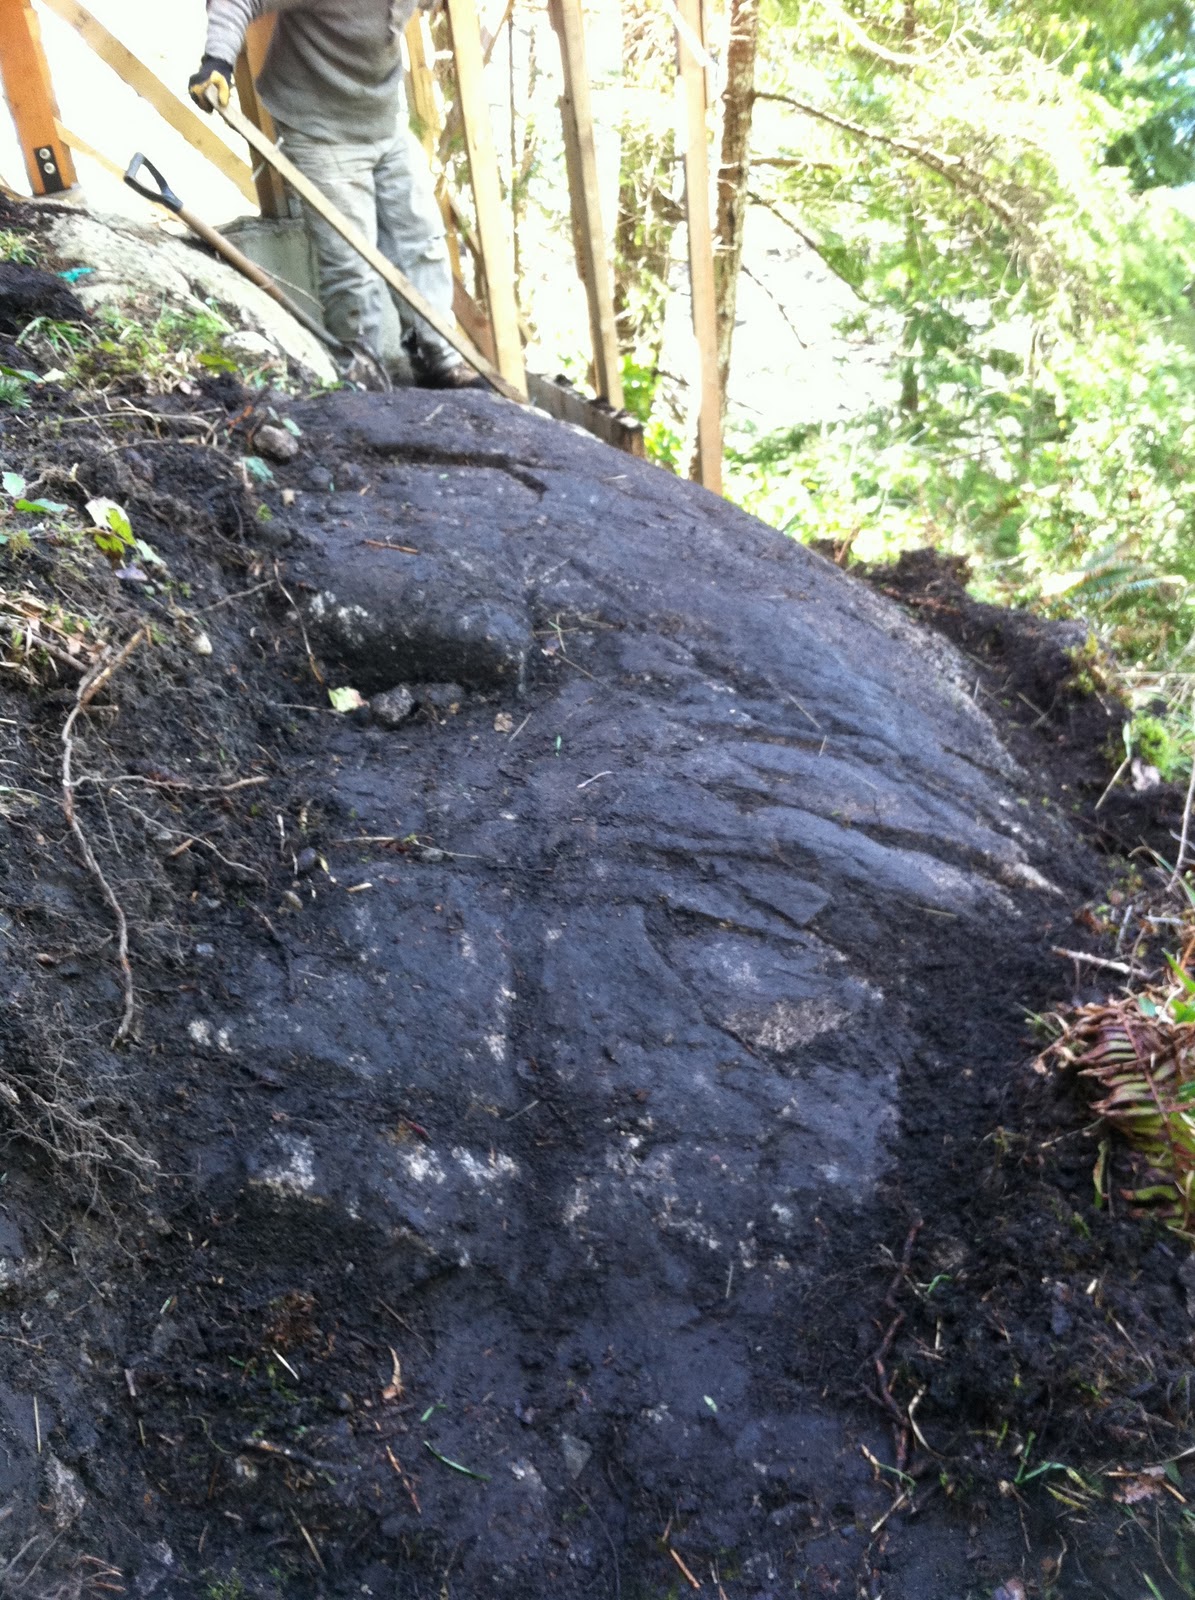
Just a shot of the dead man beam notched into the side of the bank in order to find a secure area to fasten it to.

In some cases a piece of backing isn't an option for securing the dead man beam and a notch or a taper must be made on the end so that it fits securely onto the bedrock.

Another option for the dead man beam is to make a "T" shape on the end of the dead man. There was no bedrock to be found so the idea of the "T" shape is to make the dead man very hard to pull through the dirt once its covered.

Often the drill bit can get stuck in the beams and patience and care must be taken to pull the bit back out again.
The bedrock that is exposed is one of the areas that we are planning on planting a large tree. The blasters will be removing some of the bedrock to provide enough room for soil and the large rootball. While uncovering the bedrock we covered the dead man with soil. Now we must wait for the blasters to drill, remove bedrock and install dowels. Looks like we will move on to taking apart the scaffold on day 6. Stay tuned...

Friday 25 February 2011

building a Retaining Wall: Day 4

This morning when we arrived at the worksite and it was back to the retaining wall as the lumber had arrived.

Mike is excited as the Country Lumber delivery truck is here at 8am this morning. (After getting a little lost)

A lift of 10' and 12' 6x6 beams is a beautiful sight. You can see a lift with some 8' as well, they will be mostly for the returns and the dead men. (More on those later)

Instead of moving the pile to the saw we decided to move the saw to the pile, much easier on the back this way.

The angled cuts are looking good, seems to be 62 degrees. All the overlapping pieces are nailed together with 10" nails.


In order to make sure all the holes line up from row to row we measure the location before putting the new piece down. Then we simply transfer the marks and drill the new piece once its in place. 

We have left the insulation covering the fresh concrete a few days now and it seams to have really hardened up. With 4 rows on this section its only gonna take on more piece before we reach the height that the blaster will need to drill the dowel holes.

On the 5th row we added what we call a dead man piece. It will stretch back under the dirt and be drilled and doweled back to the bead rock to stop the forces from the backfill pushing near the top of the wall.

This piece must be very well fastened to the wall because there will be a lot of sideways pressure near the middle and top of the wall. I am drilling pilot holes for the nails which will fasten the dead man to the wall.

Some of the beams have been left long and we will trim and clean them up later with a chainsaw power planer combo.

Here is the nailing pattern that we used for the dead man. It will also be very well nailed to the piece above it. 

"LARGE BIRD" Ian yelled. Your not the only ones interested in our project. This bald eagle is watching us work. There is a video of it on YouTube if you would like to check it out... Eagle Video

The end of the dead man beam will be drilled and doweled just as the rest of the wall. Care must be taken not to drill to deep when the piece is over bedrock. Hitting the the rock would damage the costly drill bit.

Thursday 24 February 2011

Building a Retaining Wall: Day 3

Today we started the morning off with a bit of forming for the post haste, which will be packed in under neath the beams where more support is needed.

Our first piece was cut out of 1/2 inch ply,  we employed the finger technique in our scribe, its pretty self explanatory.


Since theres relatively no pressure behind the ply there are no other procedures other than attaching the piece to the beam in which we used 2 1/4 inch common nails 

Heres what our form looks like.  Sadly though, we have to hold off on the next step untill the temp goes a little higher.  The temp should be about -7 with a wind chill of -20 so no pouring :(

Our next chore was to prep for our next beam and seeing how we are overlapping the beams we needed to mark and cut out were the next beam will lie.


Now that the beam is cut, we only need to hurry up and wait for th material to arrive.
A birdie told me it should arrive tomorrow.

Since were already at the work site,we decided to go ahead start the next project that is tied to this project, a deck and walk way to the mechanical room.  We started with removing all items from the work deck that was built to finish the house after framing was complete.

Its always a good habit to pull all nails as the demo goes to keep ahead of the tedious tasks as well as promote safe work procedures. There will be a walkway connecting the upper deck with the retaining wall planterbox,with walkway connecting the deck beneath the house to another walkway to the mechanisal room.  

Wednesday 23 February 2011

Building a Retaining Wall: Day 2

Today was the second day of work on the retaining wall and I'm happy to say that a lot more visual progress was made. Today we mainly worked on setting down the first coarse of pressure treated 6x6 beams that the retaining wall will be made from. Once the first coarse is laid out and levelled the rest go on quite quickly.

This morning our concrete had set up and we could start to lay down the beams for the wall.

We are using a 10" circular saw to cut the 6x6  beams. It's a little slower than using a chainsaw but the resulting cut looks a lot better.

After the cuts we have to paint the ends with a preservative to protect the freshly cut wood.

Once the pieces are placed into position, we level and brace then until we can pour concrete under then ends to fully support them. 

In some spots in order to run the beams through at the correct height we needed to jackhammer bedrock out of the way. A lot of rock had to be taken out of this section so that the 12' beam could land on both bearing points without having to be cut.

The first row of beams are laid out and temporarily supported.

We got each piece levelled out and now its time to start filling in the spots underneath the first row to make sure all the soil wont pour out and to make sure the rest of the wall is bearing down directly onto the ground.

In one case a 45 degree mitre had so be cut along a scribed line so that the piece would fit properly. 

Here is another shot of the mitred cut we made.

To make sure the wall doesn't slide down the side of the cliff we are drilling 1 1/2" holes through the beams at certain locations.

When the walls are stacked higher we will have a blasting company come and drill holes deep into the bedrock. We will then grout epoxy coated rebar dowels into the rock to make sure the walls don't go anywhere. 

We then started stacking more 6x6's on top of the first row.

To fasten the beams together we are using 10" galvanized nails. To make it easier we are pre drilling holes for the nails with a 1/4" auger bit.

This is our scribed piece from earlier and I think it looks pretty sweet ass.

We are using a large angle drill to make our 1 1/2" holes through the 6x6.

After we had placed as many beams as we could for now we mixed some post haste concrete and packed it underneath the beams to make sure we had good bearing. Again we covered it with insulation and plastic over night to keep it warm.

We had tacked some pieces of plywood on the bottom of the beams so that the concrete we packed underneath wouldn't slide down the hill.

We have to measure and transfer the locations of the original holes so that they line up when we stack the new pieces on top.

At the end of today this is what things are looking like.

Tuesday 22 February 2011

Building a Retaining Wall: Day 1

Today is the first day of work on a retaining wall Mike and I are working on for the next little while. The wall will be primarily to provide an area for planting. The homeowners would like to plant a large tree in between the two houses for privacy. Today's work will mostly include excavation and laying out the exact location. 

This is the area before any work had began. It is located in between the two houses it's very open and lacks privacy. We have to scrape the bedrock clean and clear away the brush and debris.

Most of Mike scraping the moss and dirt off the bedrock. For the most part digging is easy and only requires a small amount of scraping to expose the bedrock.

Finally some quick scraping with a small hand tool allows us to get a clean surface so that any concrete we need to poor will bond well.

The part that I have chosen to prepare has proven to be quite a lot more work. Having dug over 2 feet down in one area without finding any bedrock, we decide to pour a concrete footing instead.

The hole is widened to provide enough bearing on the loose soil. Filling the hole with some large rocks helps to take up some space so that it doesn't take to much concrete to fill the hole.

After hand mixing 5 bags of ready mix concrete on a tarp the footing is poured and there will be some adequate bearing for our retaining wall in this area. The tarp is placed over the top and covered with insulation to keep it warm enough to set up over night.